
If you’re looking for a quick and healthy snack, try making your own DIY energy bars. These simple recipes are perfect for on-the-go snacks and can be made with pantry staples. Whether you’re looking for a breakfast option, a snack to take to work or school, or something to keep you fueled during a workout, these homemade energy bars are the perfect choice.
Key Takeaways:
- DIY energy bars are a quick and healthy snack option.
- They can be made with pantry staples.
- Perfect for on-the-go snacks, breakfast, or to fuel your workouts.
- Customizable to suit your taste preferences and dietary needs.
- A cost-effective alternative to store-bought energy bars.
Why Make DIY Energy Bars?
Making your own energy bars has several advantages. First, you have control over the ingredients, which means you can avoid any unnecessary additives or preservatives that are often found in store-bought bars.
For example, many commercial energy bars contain high amounts of added sugars, artificial flavors, and hydrogenated oils. By making your own bars, you can choose wholesome ingredients and ensure that you’re fueling your body with real, nourishing food.
Second, you can customize the recipes to suit your taste preferences and dietary needs. Whether you prefer chocolate chip, peanut butter, or a mix of various nuts and seeds, you can create energy bars that cater to your cravings.
Additionally, if you follow a specific diet or have dietary restrictions, making your own energy bars allows you to accommodate those needs more easily. You can choose gluten-free, dairy-free, or vegan ingredients, ensuring that your homemade bars align with your nutritional requirements.
Finally, making your own energy bars is often more cost-effective than buying them from the store, saving you money in the long run.
Store-bought energy bars can be quite expensive, especially if you consume them regularly. By purchasing individual ingredients and making your own bars, you’ll not only save money but also have the satisfaction of creating a nutritious snack from scratch.
So why spend extra money on questionable ingredients and artificial flavors when you can easily create delicious, healthy energy bars in the comfort of your own kitchen?

The Benefits of Homemade Energy Bars
| Benefits of Homemade Energy Bars |
|---|
| Control over ingredients |
| Customizable to taste preferences and dietary needs |
| Cost-effective |
| Wholesome and nourishing |
The Benefits of Homemade Energy Bars
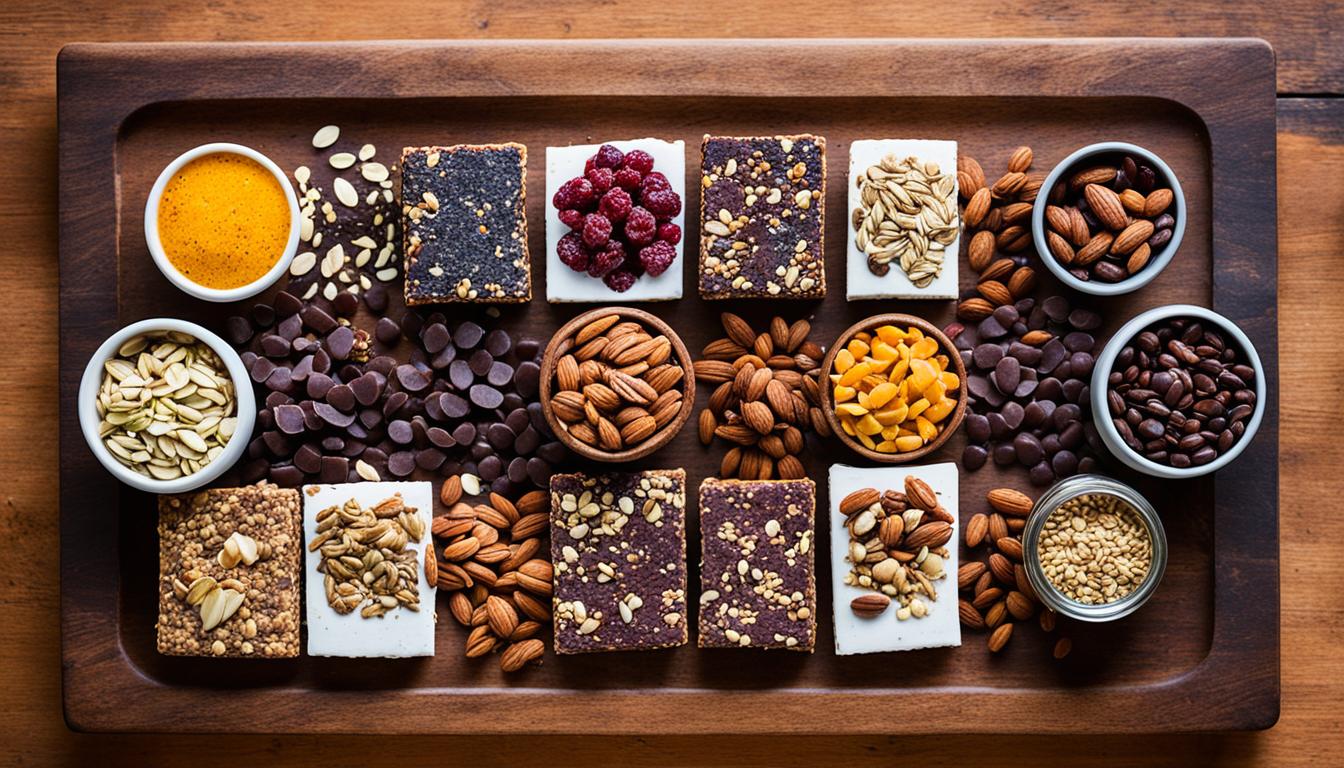
Homemade energy bars offer a multitude of benefits that make them an excellent choice for nutritious snacking. When you make your own energy bars at home, you have the freedom to select high-quality ingredients that nourish your body while satisfying your taste buds.
By creating homemade energy bars, you can include ingredients like nuts and seeds, which are packed with healthy fats, protein, and fiber. These nutrient powerhouses provide sustained energy, keep you feeling full, and support overall health.
Additionally, homemade energy bars allow you to incorporate dried fruits, offering natural sweetness and a boost of essential vitamins and minerals. It’s a fantastic way to enjoy a burst of flavor while reaping the benefits of these wholesome ingredients.
Control Over Ingredients and Nutritional Content
One of the significant advantages of making your own energy bars is having control over the recipe’s nutritional content. You can tailor the ingredients to meet your specific dietary needs, ensuring that the bars align with your health and wellness goals.
“Homemade energy bars allow you to take charge of what goes into your body, ensuring that you fuel yourself with the nutrients you need for optimal health and performance.”
– Nutritionist Rachel Smith
With store-bought energy bars, you may encounter additives, preservatives, or artificial ingredients that you prefer to avoid. By crafting your own bars, you eliminate these unnecessary additions, creating a snack that is pure, wholesome, and free from any unwanted substances.
Cost-Effective and Environmentally Friendly
Making your own energy bars is not only a healthier choice but also a cost-effective one. Store-bought energy bars can be quite pricey, especially if you consume them regularly. Crafting your own bars allows you to save money while still enjoying a convenient and nutritious snack.
Furthermore, by preparing your own snacks, you reduce packaging waste and contribute to a more sustainable lifestyle. You can store your homemade energy bars in reusable containers, eliminating the need for disposable wrappers and boxes.
Customization and Variety
With homemade energy bars, you have unlimited opportunities for creative customization. You can experiment with various flavor profiles by adding spices like cinnamon, nutmeg, or even a pinch of sea salt. This allows you to personalize your bars according to your taste preferences and create a snack that excites your palate.
Additionally, you can switch up the ingredients in your homemade bars to provide variety and keep your snacking routine interesting. From different combinations of nuts and seeds to variations with dried fruits, the options are endless. With each batch, you can craft unique energy bars that cater to your cravings and nutritional needs.

By choosing homemade energy bars, you prioritize your well-being, flavor preferences, and budget. Take the reins and create your own nutritious and delicious DIY energy bars today.
Gluten-Free Options
If you have dietary restrictions or preferences, you can easily make gluten-free energy bars at home. By substituting regular oats with certified gluten-free oats, you can ensure that your energy bars are safe for those with gluten sensitivities or celiac disease. Additionally, you can experiment with alternative grains like quinoa or amaranth to create gluten-free options that are just as delicious and nutritious.
Gluten-free energy bars are not only a great choice for individuals with dietary restrictions, but they can also be enjoyed by anyone looking for a healthy and tasty snack. With a few simple substitutions, you can create energy bars that cater to your specific dietary needs, without compromising on flavor or quality.
Why Choose Gluten-Free Energy Bars?
There are several reasons why gluten-free energy bars are a fantastic option for individuals with gluten sensitivities or dietary restrictions:
- Dietary Compliance: By making gluten-free energy bars at home, you have complete control over the ingredients and can ensure that they align with your dietary needs.
- Health Benefits: Gluten-free energy bars can be made with nutritious ingredients like nuts, seeds, and dried fruits, providing essential vitamins, minerals, and fiber.
- Taste and Variety: Experimenting with alternative grains like quinoa or amaranth can introduce new flavors and textures to your energy bars, keeping your snacking routine exciting.
Whether you have a gluten sensitivity, celiac disease, or simply prefer to avoid gluten in your diet, making gluten-free energy bars allows you to enjoy a convenient and wholesome snack that aligns with your dietary needs.
Simple Gluten-Free Energy Bar Recipe
Here’s a simple recipe to get you started on making your own gluten-free energy bars:
| Ingredients | Instructions |
|---|---|
|
|
This recipe serves as a starting point, but feel free to customize it with your favorite gluten-free ingredients and flavors. Get creative and make energy bars that perfectly match your taste preferences and dietary requirements.
“By making gluten-free energy bars at home, you can enjoy a convenient and wholesome snack that aligns with your dietary needs.”
With the growing demand for gluten-free options, making your own gluten-free energy bars is a practical solution that allows you to have delicious and nutritious snacks readily available. Whether you have a gluten sensitivity or are simply looking to try something new, these homemade bars provide a convenient and satisfying way to fuel your body.
Nut Butter Variations
When it comes to creating delicious and flavorful energy bars, nut butter is a key ingredient that adds richness and a satisfying taste. While peanut butter is a classic choice, don’t be afraid to explore different nut butters to create unique and exciting flavor combinations for your homemade energy bars.
Try experimenting with almond butter, which offers a slightly sweet and nutty flavor, or cashew butter, known for its creamy and indulgent taste. If you have a nut allergy or prefer a nut-free option, consider using sunflower seed butter as a delicious alternative.
Each type of nut butter brings its own distinct taste and nutritional profile to your energy bars. Almond butter is rich in vitamin E and healthy fats, while cashew butter provides a creamy texture and is a good source of minerals like copper and magnesium. Sunflower seed butter is packed with vitamin E and offers a satisfying crunch.
Get creative with your energy bar recipes and find your favorite nut butter to elevate the flavor and nutritional value of your homemade treats.

No-Bake Recipes
When it comes to making your own energy bars, one of the greatest advantages is that many recipes don’t require any baking. This means you can skip the hassle of heating up your oven and spend less time in the kitchen. Instead, you can enjoy the convenience of no-bake recipes that are quick and easy to make.
No-bake energy bars are a fantastic option for those who are looking for a fast and nutritious snack without the need for baking expertise or complicated techniques. These recipes typically involve mixing the ingredients together, pressing the mixture into a pan or mold, and letting it set in the fridge or freezer. The result is a delicious and satisfying snack that’s ready to be enjoyed whenever you need a boost of energy.
Not only are no-bake energy bars simple to make, but they also offer a great deal of versatility. You can experiment with different combinations of nuts, seeds, dried fruits, and sweeteners to create a variety of flavors and textures. Whether you prefer a classic combination like almond and cranberry or a more adventurous blend of cashews and coconut, there’s a no-bake energy bar recipe to suit every taste.
Furthermore, no-bake energy bars are perfect for busy individuals who are always on the go. You can prepare a batch of these bars in advance and store them in the fridge or freezer for easy access. Whether you need a quick breakfast before heading out for the day or a snack during a busy afternoon, these portable and nutritious bars have got you covered.
Benefits of No-Bake Energy Bars:
- Convenient and time-saving
- Easy to prepare with minimal kitchen skills
- Customizable with various ingredients and flavors
- Perfect for busy individuals and on-the-go snacking
To give you an idea of the delicious possibilities, here’s an example of a popular no-bake energy bar recipe:
No-Bake Peanut Butter Chocolate Chip Energy Bars
Ingredients:
- 1 cup rolled oats
- 1/2 cup peanut butter
- 1/4 cup honey
- 1/4 cup chocolate chips
- 1/4 cup chopped nuts (optional)
Instructions:
- In a mixing bowl, combine the rolled oats, peanut butter, and honey.
- Add the chocolate chips and chopped nuts (if desired) and mix well.
- Press the mixture into a lined baking dish or mold.
- Refrigerate for at least 1 hour to allow the bars to set.
- Cut into individual bars and enjoy!
This recipe can be easily customized by substituting different types of nut butter, sweeteners, or mix-ins. Feel free to get creative and tailor the flavors to your personal preferences.
So, if you’re looking for a convenient and delicious snack that requires no baking, give no-bake energy bars a try. With their simplicity and versatility, these quick energy bars are sure to become a staple in your healthy snacking routine.

Storage and Portability Tips
To ensure your homemade energy bars stay fresh and portable, it’s important to store them properly. Keep them in an airtight container in the fridge or freezer to maintain their texture and prevent them from spoiling.
If you plan to take them on the go, pack them in a lunchbox or a resealable bag to keep them protected. With the right storage and portability tips, you can enjoy homemade energy bars wherever you are.
By storing your homemade snacks correctly, you can enjoy the convenience of portable energy bars that are always ready to fuel your day.
Flavor and Ingredient Variations
Homemade energy bars offer a world of possibilities when it comes to flavors and ingredients. With just a few simple additions, you can elevate the taste and create unique combinations that suit your preferences. Here are some ideas to inspire your creativity:
Cinnamon and Nutmeg Delight
Adding a dash of cinnamon or nutmeg can bring warmth and depth to your energy bars. These spices not only enhance the flavor but also add a touch of comforting aroma. Try sprinkling cinnamon powder on top of your bars for an extra burst of flavor.
Trail Mix Extravaganza
For a variety of textures and tastes, mix in your favorite trail mix ingredients such as dried fruits, nuts, and seeds. Whether it’s crunchy almonds, chewy raisins, or zesty sunflower seeds, each bite will surprise your taste buds. Experiment with different combinations until you find your perfect trail mix blend.
Tropical Paradise
Transport yourself to a tropical getaway by incorporating dried tropical fruits like mango, pineapple, or coconut into your energy bars. Not only do these fruits add a chewy texture, but they also infuse your bars with a hint of sweetness and exotic flavors. Get a taste of the tropics with every bite.
“By infusing your energy bars with different flavors and ingredients, you can create a snack that not only provides the necessary fuel but also indulges your taste buds.”
Superfood Boost
Add a nutritional punch to your energy bars by including superfoods like chia seeds, flaxseeds, or hemp seeds. These tiny powerhouses are packed with essential nutrients and add a delightful crunch to your bars. Elevate the nutritional profile of your bars with the goodness of superfoods.
Decadent Chocolate Indulgence
For the chocolate lovers out there, consider incorporating dark chocolate chips or cacao nibs into your energy bars. The rich and intense flavor of chocolate pairs perfectly with the wholesome ingredients, creating a satisfying treat. Indulge in a guilt-free chocolate experience with homemade energy bars.
| Flavor | Ingredients |
|---|---|
| Cinnamon and Nutmeg Delight | Cinnamon, nutmeg |
| Trail Mix Extravaganza | Dried fruits, nuts, seeds |
| Tropical Paradise | Dried tropical fruits |
| Superfood Boost | Chia seeds, flaxseeds, hemp seeds |
| Decadent Chocolate Indulgence | Dark chocolate chips, cacao nibs |
With these flavor and ingredient variations, you can create a wide array of homemade energy bars that cater to your taste preferences. Let your imagination run wild and enjoy the process of discovering new combinations that will keep your snack time exciting and delicious.
Tips for Making Homemade Energy Bars
When it comes to making your own DIY energy bars, a few tips can make the process even easier. Here are some helpful suggestions to ensure your homemade snack recipes turn out delicious and nutritious:
-
Use a food processor:
Ditch the manual stirring and opt for a food processor instead. This handy kitchen tool will quickly and evenly mix all your ingredients together, saving you time and effort.
-
Press the mixture firmly:
After combining the ingredients, make sure to press the mixture firmly into the pan. This step ensures that your energy bars hold together and maintain their shape, making them easier to eat and enjoy.
-
Use parchment paper or a non-stick baking dish:
To avoid any sticking or mess, line your pan with parchment paper or use a non-stick baking dish. This simple trick allows for easy removal of the bars once they’re finished, making clean-up a breeze.
-
Experiment with different shapes and sizes:
Don’t be afraid to get creative with your energy bars. Try using various molds or cutting techniques to shape them differently. You can go for traditional rectangular bars or switch things up with fun shapes like circles or squares.
-
Double or triple the recipe:
If you want to have snacks on hand throughout the week, consider doubling or tripling the recipe. Making a larger batch saves you time and allows you to stock up on these healthy snacks without having to make them as frequently.
Follow these handy tips to streamline your DIY energy bar-making process and enjoy the convenience of having homemade and nutritious snacks whenever you need them.
Conclusion
Making your own DIY energy bars is a rewarding and beneficial process. With the variety of recipes available, you can easily find ones that suit your preferences and keep you energized throughout the day. Not only do you have control over the ingredients and flavors, but you also get to enjoy delicious and nutritious snacks that are tailored to your taste and dietary needs.
By making homemade energy bars, you can avoid any unnecessary additives or preservatives often found in store-bought bars. You can choose high-quality ingredients like nuts, seeds, and dried fruits, which provide essential nutrients like healthy fats, protein, and fiber. These homemade bars are a great way to fuel your body with wholesome ingredients.
So why not give homemade energy bars a try and enjoy the benefits they bring to your snacking routine? Whether you’re looking for a quick breakfast option, a snack to take on-the-go, or something to keep you fueled during a workout, DIY energy bars are the perfect choice. Not only will you save money by making them at home, but you’ll also have the satisfaction of creating your own nutritious and delicious homemade snacks.
FAQ
Why should I make my own DIY energy bars?
Making your own DIY energy bars allows you to control the ingredients, customize the recipes to your taste preferences and dietary needs, and save money compared to store-bought bars.
Are homemade energy bars nutritious?
Yes, homemade energy bars can be nutritious when made with high-quality ingredients like nuts, seeds, and dried fruits that provide essential nutrients like healthy fats, protein, fiber, vitamins, and minerals.
Are there gluten-free options for energy bars?
Yes, you can easily make gluten-free energy bars by substituting regular oats with certified gluten-free oats or using alternative grains like quinoa or amaranth.
What are some nut butter variations I can use in energy bars?
While peanut butter is a popular choice, you can experiment with different nut butters like almond butter, cashew butter, or sunflower seed butter to create unique flavor combinations.
Can I make energy bars without baking?
Yes, many energy bar recipes are no-bake, meaning you can simply mix the ingredients together, press the mixture into a pan or mold, and let it set in the fridge or freezer.
How should I store homemade energy bars?
To keep homemade energy bars fresh and portable, store them in an airtight container in the fridge or freezer. If you plan to take them on the go, pack them in a lunchbox or resealable bag.
Can I customize the flavors and ingredients in homemade energy bars?
Yes, homemade energy bars are incredibly versatile, allowing you to experiment with different flavors by adding spices like cinnamon or nutmeg and mixing in a variety of dried fruits, nuts, and seeds.
What are some tips for making homemade energy bars?
Some tips for making homemade energy bars include using a food processor to quickly mix the ingredients, pressing the mixture firmly into the pan, using parchment paper or a non-stick baking dish for easy removal, experimenting with shapes and sizes, and making larger batches to have snacks throughout the week.