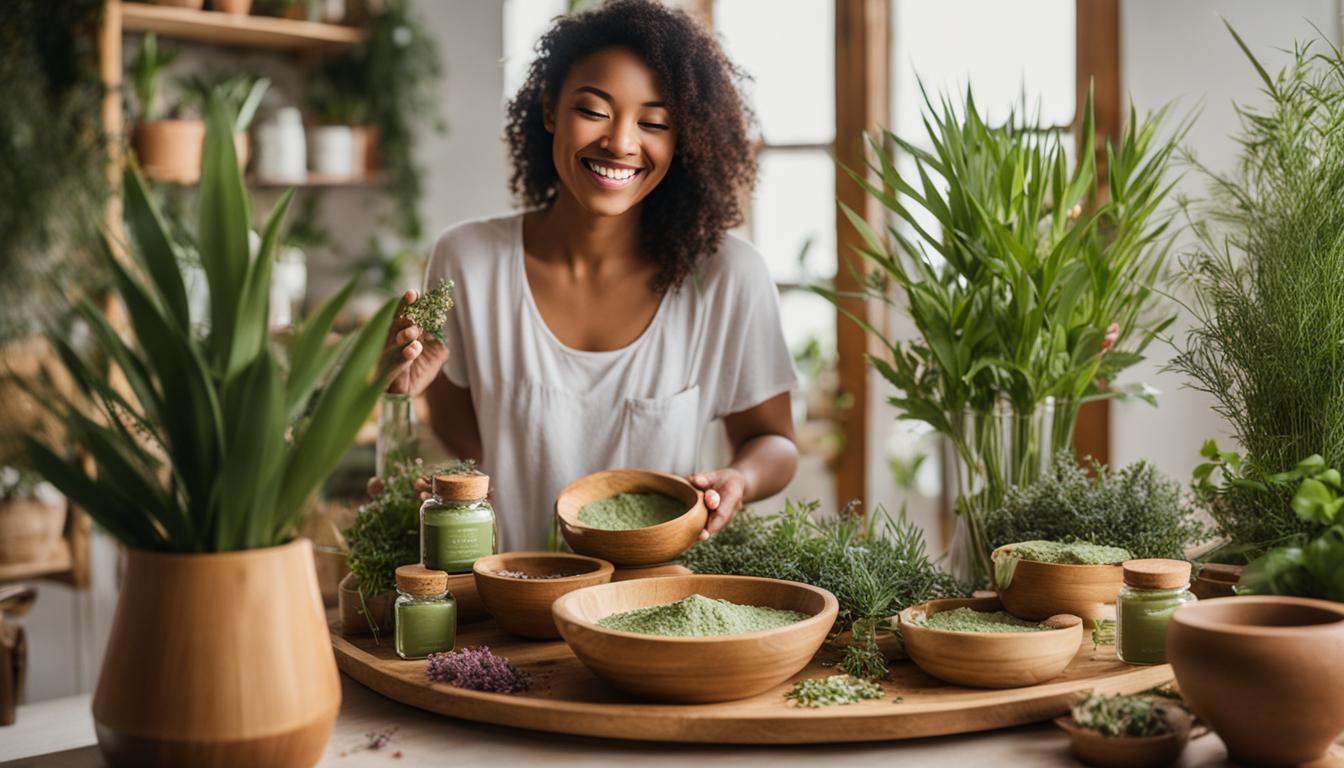
Hey there! Looking for ways to take care of yourself and the planet at the same time? I’ve got you covered with some amazing DIY natural beauty recipes. With these recipes, you can create your own eco-friendly skincare and beauty products, using simple and sustainable ingredients. Let’s dive in and discover how you can become a greener you!
Key Takeaways:
- By making your own beauty products, you can reduce waste and use natural ingredients.
- Ice cool refreshing discs made from green tea and cotton rounds can soothe tired eyes.
- Whipped body butter made with organic ingredients nourishes and moisturizes the skin.
- A zero waste mouthwash recipe promotes healthy gums without harmful chemicals.
- Make your own deodorant for an effective and eco-friendly alternative.
Ice Cool Refreshing Discs for Tired Eyes
Tired and puffy eyes? I’ve got just the solution for you! Introducing ice cool refreshing discs made from leftover green tea and cotton rounds. It’s a DIY natural beauty recipe that’s not only refreshing but also plastic-free. So, let me show you how to whip up these soothing eye discs in no time!
To make these green tea eye discs, all you need is:
- Half a cup of green tea
- Cotton rounds
- A mason jar
Here’s what you do:
- Pour the green tea into a mason jar.
- Add the cotton rounds to the jar, ensuring they are fully soaked in the tea.
- Seal the jar and pop it in the refrigerator to chill.
- When you’re ready to give your eyes some TLC, take out a disc and place it gently over your closed eyes.
- Relax and let the coolness and nourishing properties of green tea work their magic.
Pro tip: You can also place the discs in the freezer for a few minutes for an extra icy sensation. Just be sure not to leave them in for too long!
These DIY ice cool refreshing discs are a fantastic way to combat tired eyes, reduce puffiness, and feel refreshed. Plus, by using leftover green tea and cotton rounds, you’re not only taking care of yourself but also being kind to the environment by cutting down on plastic waste.
So the next time you find yourself reaching for conventional eye treatments, why not give these green tea eye discs a try? Your eyes will thank you!
Now, take a look at these soothing green tea eye discs:
Whipped Body Butter for Nourished Skin
Nourish your skin with a homemade whipped body butter made with organic ingredients. This recipe includes organic cacao butter, coconut oil, sweet almond oil, vitamin E oil, and lavender essential oil. Melt the ingredients together, let it cool, then whip until you achieve a soft buttery texture. This DIY body butter is free from chemicals and microplastics found in commercial products and will leave your skin feeling moisturized and healthy.
Organic skincare is all about embracing the goodness of nature while taking care of your skin. By making your own homemade beauty products, you have complete control over the ingredients used, ensuring that only the best and most nourishing elements touch your skin.
Why Choose DIY Body Butter?
Commercial body butters often contain synthetic fragrances, preservatives, and unnecessary fillers that can strip your skin’s natural moisture and cause irritation. By using a DIY body butter recipe, you can create a luxurious and effective moisturizer tailored to your skin’s needs. Plus, it’s a fun and rewarding process!
“I love making my own body butter because I know exactly what goes into it. No hidden chemicals or additives, just pure, organic goodness for my skin!” – Emma, Natural Beauty Enthusiast
The Ingredients
Let’s take a closer look at the key ingredients that make this whipped body butter so nourishing:
| Ingredient | Benefits |
|---|---|
| Organic cacao butter | Deeply moisturizes and softens the skin |
| Coconut oil | Locks in moisture and provides antibacterial properties |
| Sweet almond oil | Nourishes and soothes the skin, rich in vitamins and antioxidants |
| Vitamin E oil | Protects against free radicals and aids in skin healing |
| Lavender essential oil | Calms and relaxes the skin, promotes a soothing aroma |
These organic ingredients work together to moisturize, protect, and rejuvenate your skin, leaving it feeling soft, supple, and healthy.
How to Make Whipped Body Butter
Making your own whipped body butter is easier than you might think. Follow these simple steps:
- Melt 1/2 cup of organic cacao butter and 1/2 cup of coconut oil in a double boiler until fully melted.
- Add 1/4 cup of sweet almond oil, 1 tablespoon of vitamin E oil, and 10-15 drops of lavender essential oil to the melted mixture. Stir well.
- Let the mixture cool for about 20-30 minutes or until it starts to solidify around the edges.
- Using an electric mixer or a hand whisk, beat the mixture until it becomes light and fluffy, resembling a whipped texture. This usually takes about 5-10 minutes.
- Scoop the whipped body butter into a clean glass jar or container.
- Store in a cool, dry place away from direct sunlight.
Now, you have a luxurious homemade body butter that’s completely free from chemicals and microplastics found in commercial products. Apply it to your skin after showering or whenever your skin needs a little extra love and moisture.
Treat Your Skin Naturally
With this DIY body butter recipe, you can indulge in the goodness of organic skincare while nourishing and pampering your skin. Embrace the power of homemade beauty products and experience the joy of taking care of your skin in a natural, sustainable way.
Zero Waste Natural Mouthwash for Healthy Gums
I always strive to find eco-friendly alternatives for everyday products, and mouthwash is no exception. By making my own natural mouthwash, I not only promote healthy gums and fresh breath but also reduce plastic waste and avoid harmful chemicals found in commercial products. With a simple DIY mouthwash recipe, you can take a step towards a plastic-free oral care routine.
| Ingredients: | Benefits: |
|---|---|
| Water | A base ingredient for dilution |
| Baking soda | Naturally fights bacteria and neutralizes acids |
| Tea tree essential oil | Antiseptic properties for oral health |
| Peppermint essential oil | Refreshing and natural breath freshener |
| Xylitol or stevia (optional) | Adds sweetness without the use of sugar |
To make your own DIY mouthwash, simply mix water, baking soda, tea tree essential oil, peppermint essential oil, and optionally xylitol or stevia for flavor. You can adjust the quantities based on your preferences, but here’s a basic ratio to get you started:
1 cup of water
1 teaspoon of baking soda
3-5 drops of tea tree essential oil
3-5 drops of peppermint essential oil
1 teaspoon of xylitol or stevia (optional)
Combine the ingredients in a clean glass bottle, give it a good shake, and your mouthwash is ready to use! Remember to shake well before each use to ensure all the ingredients are properly mixed.
This DIY mouthwash not only freshens your breath but also helps maintain healthy gums. Baking soda neutralizes acids that can cause tooth decay, while tea tree essential oil provides antiseptic properties to combat bacteria. Peppermint essential oil adds a refreshing touch, leaving your mouth feeling clean and minty. The optional xylitol or stevia gives a hint of sweetness without the use of sugar.
By making your own DIY mouthwash, you not only reduce plastic waste but also have control over the ingredients you use. Commercial mouthwashes often come in plastic bottles that contribute to environmental pollution. Additionally, some contain artificial colors, alcohol, and other harsh chemicals that can be harmful to your oral health in the long run.
So why not give this zero waste mouthwash a try? It’s a simple and affordable solution for a healthier mouth and a greener planet.
Zero Waste Deodorant for Fresh Underarms
Say goodbye to store-bought deodorants and make your own zero waste deodorant at home. It’s easier than you think! Not only will you be reducing plastic waste, but you’ll also have control over the ingredients going on your skin. Two recipe options are available for you to choose from, one with arrowroot and another with corn starch. Whichever you choose, you’ll need bicarbonate soda, coconut oil, and essential oils of your choice to create a personalized scent.
Mixing the ingredients together is a breeze! Combine the dry ingredients – either arrowroot or corn starch – with bicarbonate soda in a bowl. Add the desired amount of coconut oil and a few drops of your favorite essential oils. Mix everything until it forms a smooth and creamy consistency.
To keep your deodorant sustainable and eco-friendly, opt for a reusable container like a glass jar. Transfer the mixture into the jar, and you’re ready to go! Remember to label your homemade deodorant, so you never get confused.
Applying your DIY deodorant is as simple as using store-bought alternatives. Just take a small amount of the mixture and apply it to your underarms. The natural ingredients will help neutralize odors, keeping you feeling fresh throughout the day.

With this DIY deodorant recipe, you can enjoy fresh underarms without contributing to plastic waste. By using natural ingredients and reusable containers, you’re making a positive impact on the environment while taking care of yourself. Ditch the harmful chemicals found in commercial deodorants and give this zero waste deodorant a try!
Make Your Own Customizable Lipstick and Blush
Create your own lipstick and blush using natural ingredients. For the lipstick, blend beeswax, coconut oil, pigment (such as beet root powder), and vitamin E oil. Pour the mixture into a recycled container and allow it to cool before use. This DIY lipstick doubles as a blush, providing a customizable and eco-friendly makeup option.
For a simpler lip tint, mix vaseline with your favorite drink powder for a subtle color and delicious taste.
DIY Lipstick Recipe
Ingredients:
- 1 tablespoon beeswax
- 1 tablespoon coconut oil
- Pigment (such as beet root powder)
- 1 teaspoon vitamin E oil
Instructions:
- In a double boiler or microwave-safe bowl, melt the beeswax and coconut oil together.
- Once melted, add the pigment of your choice. The beet root powder can provide a natural lip color.
- Mix well until the pigment is evenly distributed.
- Add the vitamin E oil and stir until fully incorporated.
- Pour the mixture into a recycled container or an empty lipstick tube.
- Allow the mixture to cool and solidify before use.
Now, you have your very own customized lipstick with a natural lip color. This DIY lipstick is free from harmful chemicals and comes in an eco-friendly container. Plus, by using beet root powder as a pigment, you can achieve a beautiful rosy hue.
Lip Tint with Vaseline and Drink Powder
Not feeling up for making lipstick? No worries! You can still create a subtle lip tint using vaseline and your favorite drink powder. Here’s how:
Ingredients:
- Vaseline
- Drink powder (such as strawberry, cherry, or raspberry)
Instructions:
- Scoop a small amount of vaseline into a container.
- Add a pinch of your favorite drink powder to the vaseline.
- Mix well until the powder is evenly distributed.
- Apply the tinted vaseline to your lips for a hint of color.
This lip tint not only adds a subtle color to your lips but also provides moisturizing benefits, thanks to the vaseline. Plus, it tastes delicious!
Hydrating Lip Balm for Soft Lips
Are your lips feeling dry and cracked? Say goodbye to chapped lips with a DIY lip balm recipe that will leave your lips soft and moisturized. Made with all-natural ingredients, this homemade lip care is a must-have in your beauty routine.
| Ingredients | Benefits |
|---|---|
| Beeswax | Creates a protective barrier on the lips |
| Coconut oil | Moisturizes and nourishes the lips |
| Shea butter | Provides deep hydration |
| Vitamin E oil | Repairs and rejuvenates the lips |
Combining these moisturizing ingredients, you can create a lip balm that is free from harsh chemicals often found in commercial products. Not only is this DIY lip balm recipe better for your lips, but it’s also a sustainable choice, reducing waste and plastic packaging.
To make your own lip balm, follow these simple steps:
- Melt together beeswax, coconut oil, shea butter, and vitamin E oil in a double boiler until fully melted.
- Pour the mixture into a container of your choice, such as a small tin or lip balm tube.
- Allow the lip balm to cool and solidify.
Once solid, you can enjoy the moisturizing benefits of your homemade lip balm. Apply it whenever your lips need a little extra care to keep them soft and healthy.
Remember, taking care of your lips is just as important as the rest of your skincare routine. By using this DIY lip balm, you can ensure that your lips stay hydrated and protected throughout the day.
So why wait? Try this DIY lip balm recipe and experience the difference of homemade lip care.
Lip Scrub for Smooth and Exfoliated Lips
Prep your lips for flawless lipstick application with a homemade lip scrub. Say goodbye to dry and chapped lips with this simple DIY lip scrub recipe that uses everyday kitchen ingredients. You’ll be amazed at the results!
What you’ll need:
- 1 tablespoon of coconut oil
- 1 tablespoon of sugar
Mix the coconut oil and sugar together in a small bowl until well combined. The sugar acts as a natural exfoliant, gently removing dead skin cells and revealing softer, smoother lips. The coconut oil helps to moisturize and nourish the lips, leaving them hydrated and supple.
To use the lip scrub, take a small amount on your finger and gently massage it onto your lips in circular motions. You can also use a soft-bristle toothbrush for a more thorough exfoliation. Rinse off the scrub with warm water and pat your lips dry.
“Using a lip scrub is a game-changer for achieving smooth, kissable lips. Plus, making your own lip scrub is not only cost-effective but also allows you to control the ingredients and avoid any harsh chemicals commonly found in store-bought products.”
After exfoliating, apply your favorite lip balm or moisturizer to keep your lips hydrated and protected. Repeat this lip scrub once or twice a week or as needed to maintain soft and healthy lips.
So why spend money on expensive lip scrubs when you can easily make your own at home? Try this DIY lip scrub recipe and say hello to irresistibly smooth and exfoliated lips!
Natural Toners for Balanced Skin
Restore your skin’s natural pH and promote a healthy complexion with homemade toners.
For a rosewater toner, simmer organic rose petals in water, strain the liquid, and mix with filtered water. You can also add rose essential oil for an indulgent scent.
Alternatively, try using witch hazel or apple cider vinegar as a toner, depending on your skin type.
These DIY toners are gentle and effective in maintaining balanced and healthy skin, giving you a glowing complexion without harsh chemicals.
| Toner Type | Ingredients |
|---|---|
| Rosewater Toner | Organic rose petals, filtered water, optional rose essential oil |
| Witch Hazel Toner | Witch hazel extract |
| Apple Cider Vinegar Toner | Apple cider vinegar, filtered water |
Homemade Foundation and Bronzer for Natural Coverage
If you’re looking for a natural and customizable makeup option, why not try making your own foundation and bronzer? With just a few simple ingredients, you can create makeup products that match your skin tone and provide a natural-looking coverage. Plus, by using natural ingredients, you can avoid harmful chemicals and excessive packaging, making it a more sustainable choice.
Create Your Own DIY Foundation
Creating your own foundation is easier than you might think. One key ingredient is arrowroot powder, which acts as a base and helps to absorb excess oil. You can customize the shade of your foundation by adding herbs and spices that match your skin tone. For a creamy texture, incorporate moisturizing oils and butters like jojoba oil or shea butter.
Here’s a simple DIY foundation recipe to get you started:
- Mix 1 tablespoon of arrowroot powder with a pinch of cocoa powder for a warm undertone.
- Add a pinch of cinnamon or nutmeg for a deeper shade.
- If you have fair skin, you can add a touch of turmeric for a lighter shade.
- Incorporate 1 tablespoon of your chosen moisturizing oil or butter.
- Blend the ingredients together until you achieve a smooth and creamy consistency.
Remember to store your homemade foundation in an airtight container to keep it fresh and ready to use whenever you need it.
Mix Up Your Own Natural Bronzer
A bronzer can add warmth and depth to your complexion, giving you that sun-kissed glow all year round. By making your own bronzer, you have complete control over the shade and intensity. For a natural-looking bronzer, use a higher concentration of herbs and spices that complement your skin tone.
Here’s a DIY bronzer recipe to help you achieve that sun-kissed look:
- Mix 1 tablespoon of arrowroot powder with a pinch of cocoa powder for a base.
- Add a pinch of cinnamon or ginger powder for a subtle warmth.
- Incorporate a pinch of turmeric for a golden undertone.
- If you prefer a more intense color, add an additional pinch of cocoa powder and spices.
Like the foundation, blend the ingredients together until they are well combined. Store your homemade bronzer in a small container for easy application.
By creating your own foundation and bronzer, you can achieve a natural-looking coverage while avoiding harmful chemicals and excessive packaging. Plus, it’s a fun and creative way to express your personal style. Give these DIY makeup options a try, and enjoy the benefits of homemade and natural beauty.
Conclusion
By embracing DIY beauty recipes, you can not only care for your skin but also contribute to a more sustainable and eco-friendly world. These simple and natural solutions allow you to nourish your skin, maintain good oral hygiene, and create personalized makeup products with ingredients you trust.
With DIY beauty, I’ve discovered that taking care of myself and the planet can go hand in hand. By reducing waste and avoiding harmful chemicals found in commercial products, I am prioritizing my health and the health of the Earth.
So why not give it a try? Start incorporating these eco-friendly beauty solutions into your daily routine and join the movement towards a greener and more sustainable lifestyle. With the power of DIY beauty recipes, you can make a positive impact while feeling good about the products you use on your skin.
FAQ
Why should I make my own beauty products?
Making your own beauty products allows you to reduce waste and use natural ingredients that are better for you and the environment. It also gives you the freedom to customize your skincare routine and avoid harmful chemicals found in commercial products.
Are these DIY beauty recipes easy to make?
Yes, these DIY beauty recipes are simple and straightforward. Most of them require only a few ingredients and basic kitchen tools. You don’t need any special skills or equipment to create your own eco-friendly beauty products.
Can I personalize these DIY beauty recipes?
Absolutely! These recipes serve as a starting point, but feel free to experiment and customize them to suit your preferences. You can adjust the ingredients, scents, and textures to create beauty products that work best for you.
Where can I find the ingredients for these DIY beauty recipes?
Many of the ingredients can be found in your local grocery store, health food stores, or online retailers specializing in natural products. Look for organic and sustainably sourced ingredients whenever possible.
How long do these homemade beauty products last?
The shelf life of homemade beauty products depends on the ingredients used. Generally, products that contain water (like toners) and those with perishable ingredients (like fresh herbs) have a shorter shelf life. It’s important to store them in a cool, dry place and use them within a few weeks or months to ensure freshness and effectiveness.
Are these DIY beauty recipes suitable for all skin types?
Most of these DIY beauty recipes are suitable for all skin types. However, it’s always a good idea to do a patch test before using any new product, especially if you have sensitive or reactive skin. If you have specific skin concerns or conditions, you may need to customize the recipes or consult a dermatologist.
Are these homemade beauty products safe to use?
When made with clean ingredients and proper hygiene practices, these homemade beauty products are generally safe to use. However, everyone’s skin is different, so it’s important to listen to your skin and discontinue use if you experience any adverse reactions. If you have any concerns, it’s always a good idea to consult a dermatologist or healthcare professional.
Can I give these homemade beauty products as gifts?
Absolutely! These DIY beauty recipes make great gifts for friends and family who appreciate natural and sustainable skincare. You can package them in reusable or recyclable containers and add personalized labels for a thoughtful and eco-friendly gift idea.
Can I use these DIY beauty recipes on my hair?
While some of these recipes can be used on your hair, it’s important to note that hair has different needs and characteristics compared to skin. It’s always best to consult with a hairstylist or haircare professional to determine the most suitable DIY recipes for your hair type and concerns.
Can I replace certain ingredients in the recipes?
Yes, you can make ingredient substitutions based on what you have available or your personal preferences. However, keep in mind that different ingredients may impact the final texture, scent, or effectiveness of the product. It’s always a good idea to do some research or consult with experienced DIY beauty enthusiasts for advice on ingredient substitutions.
[…] they are also better for the environment as they break down naturally over time. Switching to these eco-friendly alternatives is a small but impactful step towards a greener […]
[…] I have fallen in love with making my own soaps after this process and I hope you enjoy this soap DIY recipe as much as I […]
[…] to customize your beauty routine with natural, skin-loving ingredients. Get creative with these DIY zero-waste makeup recipes and take control of your beauty […]
[…] sustainable materials, participate in recycling programs, and choose clean formulas for a greener and more eco-friendly beauty […]
[…] days when beauty was all about the latest shade of lipstick or nail polish. Today, environmentally friendly beauty practices and natural beauty products are becoming the new […]
[…] DIY beauty products: Explore DIY recipes for skincare and beauty products using natural ingredients. This not only reduces packaging waste but also allows you to customize products based on your skin’s needs. […]
[…] and embrace a more eco-friendly beauty routine. From choosing ethical fashion brands to exploring DIY beauty recipes, there are plenty of exciting ways to incorporate sustainability into your daily […]
[…] reducing waste, and supporting brands that prioritize eco-conscious values. By adopting an eco-friendly beauty routine, you’ll not only be doing your part for the planet but also taking care of your own […]